Bird Spike Installation Guide
Ecogreen Bird Spikes are designed for easy, professional installation. Whether you are a homeowner or a commercial contractor, follow this guide for a permanent, bird-free result.
Unsure of your requirements? WhatsApp / Call / Email us for fast, friendly advice. Or send us a photo of your problem area for direct help.
Phase 1: Preparation
1. Measure Your Surface Establish how many meters you require. Our bird spikes are available in 10m & 20m boxes.
Note: Based on your specific ledge type (a back wall or open-sided), your spike placing will change (see the Spacing Guide below).
2. Clean the Surface For the adhesive to bond permanently, the surface must be clean and dry.
Use hot soapy water, a brush, and gloves to remove bird droppings, dust, and debris.
Pro Tip: Wear a dust mask when cleaning dry bird droppings for your safety.
3. Choose Your Fixings
Glue: Use a high-quality outdoor adhesive (we recommend 1 x 300ml tube per 20m–30m of spikes). Do not use standard silicone, as it will degrade in the sun.
Gutter Clips: Use for gutter installations.
Remova-Clips: Use for temporary, removable installations.
Cable Ties: Use for round pipes or railings.
Phase 2: Application
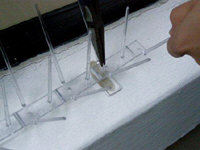
- Applying the Adhesive Apply a consistent line of glue along the underside of the spike base.
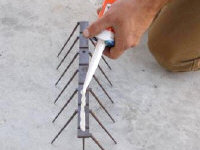
2. Placement Press the spike strip firmly onto the surface. Follow the glue manufacturer’s instructions for pressure and drying times.
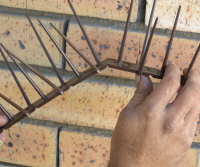
3. Custom Fitting If you reach the end of a ledge and need a shorter piece, the base has snap-off points—no cutting required.
Phase 3: The Spacing Rules (Optimal Protection)
To ensure total bird exclusion, follow these placement guidelines based on your specific ledge type:
1. Open Ledges (No Back Wall)
Coverage: A single row can protect ledges up to 18cm wide.
The 3cm Rule: Center the spikes so there is no more than 3cm of exposed ledge on either side. Birds require at least 4–5cm to land; a 3cm gap is too small for them to balance.
End-to-End: Install strips with zero gaps between the lengths.
2. Ledges With a Back Wall or Vertical Surface
Coverage: A single row protects ledges up to 15cm wide.
Positioning: Install the spikes flush against the back wall.
Why? Unlike open ledges, birds can use a wall to brace themselves. Even a tiny gap at the back allows them to stand or start a nest.
Front Edge: Leave no more than 3cm of exposed ledge at the front.
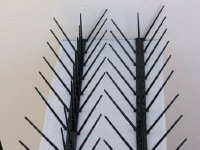
3. Multiple Row Installations (Wide Areas)
For ledges or beams wider than 18cm:
Row Spacing: Space the rows so there is no more than 3cm between the top spike widths.
Zero Landing Zones: Birds will not attempt to land in the narrow gap between rows because there is no vertical surface to brace against.
Special Installations
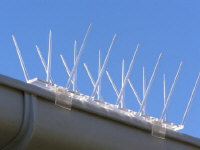
Gutters: Clip the Gutter Clips onto the spikes first, then hook them onto the gutter edge. This allows for easy removal when cleaning gutters.
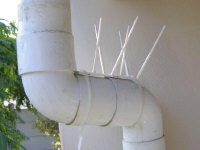
Round Pipes: Apply glue to the base and secure with cable ties for extra stability.
Remova-Clips: Use these if you need to frequently remove spikes for maintenance.
Use 60 gutter or remova-clips per 10 meters of bird spike.
Need a Custom Solution? Every situation is unique. If you are dealing with a complex architectural problem, a large-scale industrial project, or a homeowner struggling with persistent birds on your roof, we are here to help.
Fast, Friendly Support - 25 Years Experience:
🟢WhatsApp – reply in 5min
📞 Call Craig 072 751 9713 talk now
🖂 Email us – reply in 30–60 min
Ecogreen Birdspike: South Africa’s trusted partner in professional bird control.